Friday, March 31, 2017

2017 Alberta Fishing Licenses


You need to get your 2017/18 Alberta Fishing License renewed! Last years is no good after today.

You can get one quick at www.albertarelm.com

Be aware of the regulation changes on the Bow River. Always check your regulations before heading somewhere new.

Wednesday, March 29, 2017

Rio Specials


This special is still on, but not for much longer. 30% OFF on all Rio Leaders and Tippets. Even wire, wire leaders, and fluorocarbon. If you're going on a saltwater trip or going Puke fishing you should stock up real cheap.

Tuesday, March 28, 2017

Tuesday Tips - Ask The Experts

Ask the Experts: How Do You Set Your Drag Before Fishing?

Written by: Phil Monahan
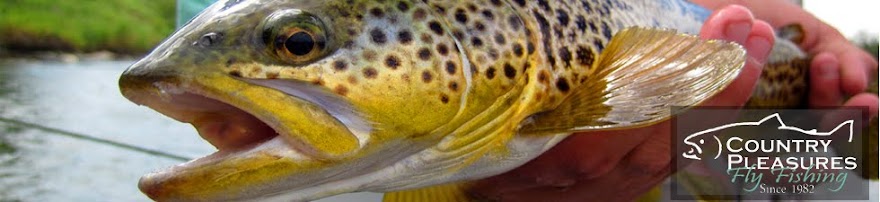
The right drag setting can be the difference between a fish in the net and a “long-distance release.”
Photo by Chad Shmukler, Hatch Magazine

Patrick Fulkrod, The South Holston River Company (Bristol, Virginia):
A super loaded question considering circumstances and variables. On an initial evaluation of my drag setting, I will always fish with it set a little on the lighter side: loose enough, but not so it will backlash. If or when I hook a good fish, I will tighten as needed. I feel it is always easier (or more forgiving) in a situation to add more drag, rather than to lessen the drag.

Tim Linehan, Linehan Outfitting Co. (Troy, Montana):
The analogy I’ve always used when discussing how to set the drag on your reel is that it’s based on the same principle as the brakes on your car. The more you need the brakes, the more you apply. Simple as that. If you’re fishing a small trout stream with little or no chance of needing any brakes to slow down fish in order to better manage them, you don’t even need a reel with drag.  But as you move up the species list in size and weight, drag becomes very important and absolutely necessary. Generally you can also base the need for drag on rod weight. If you’re fishing rod weights of 1-4, you’re likely not really fishing for monster fish that will require the use of drag.  As you start heading upwards of 5-weights, drag will come into play.
So, how best to set the drag? Regardless of what species you may be targeting, you want to set the drag to accommodate the particular behavior, size, and weight of that species. Taking that into account, the standard way to check and properly set the drag is to assess approximately how much resistance you believe is necessary to let the fish run, so as to apply the brakes and also to prevent the spool from over running and creating a mess. This is a dance, and it’s often learned from trial and error. Too much drag and the fish will break off; too little and, well, you’ll lose the fish for other reasons.
When you’re ready to actually set the drag, simply judge how much resistance you want to start with by pulling line off the reel with the drag set to your liking. And keep in mind, there is always time to tighten the drag during the fight with bigger fish, especially salt water species. In the end, if you break a fish off because the drag was too tight, loosen it. If you break a fish off because the spool over ran, tighten it.

Brown Hobson, Brown Trout Fly Fishing (Asheville, North Carolina):
I’d rather have it too loose than too tight, but I don’t want it so loose that when the reel engages I get a backlash. I like to tighten the drag once the trout puts himself on the reel. I know if I can survive the first run of a big fish, I’m probably going to land him, so the worst thing I can do is break him off because initially my drag is too tight.
My plan is always to fight the trout by stripping with my line hand, and the drag is purely a back up. Sometimes when I’m fishing with a light tippet in an area dense with large trout, I will plan on using the reel because the drag is better able to dampen tippet pressure than I can and I will have to clear less line off the water. Really there is no substitute for experience when adjusting drag on a fish. Unfortunately new anglers will just have to break some off while learning how much pressure their rod/line combo will allow them to apply.
I’ll repeat the most important thing in my opinion: If you survive the first run, you will likely win the battle. Most of the big fish my clients lose break off in the first 5 to 10 seconds. The trout is too unpredictable at that point. Just keep him hooked until he settles down, and then increase drag/pressure whenever he is not kicking his tail or shaking his head.

Joe Demalderis, Cross Current Guide Service (Milford, Pennsylvania):
One of the mysteries of the Universe is how much to set the drag on a fly reel, and the answer is: it depends. So the mystery lives on. But there is a solution to this, and whether right or wrong, it’s how I do it and it’s worked out okay for a long time. Basically, just tighten the drag so it doesn’t backlash if you give the line a fast, long pull with your hand.
But, there must be more to it than that? Yes, there is. Add in the tippet strength, rod weight, rod action, hook size, fish species, and water conditions, and you will find some adjustments might be needed.
For many freshwater fish, the backlash rule works fine, but others like salmon, steelhead, giant carp, stripers, big pike, and muskies require a tighter drag. Your tippet strength will help you there. A 30-pound leader for pike or muskie will allow for a higher setting, and the same is true for freshwater stripers. Leader-shy salmon or steelhead need lighter tippets, so there you want the drag on the light side to keep that often blistering first run form breaking you off.
Remember, your fly line is pretty thick stuff, and as it zips through the water, it actually creates its own drag. How much you bend the rod, the rod action, and the angle you hold the rod also puts varying amounts of drag on your set up. I like to use these dynamics in playing or fighting a fish and not depend too much on the mechanical drag. A quick change in angle or rod height can put less or more pressure on a fish. Things happen fast, and a change of rod angle and the like can be made very quickly if needed. Then there’s palming the reel to add more drag on a drag set too loose.
Confused? Don’t be. Set the drag at that pre-backlash level. Go fishing. If you hook a big fish that needs more drag to quickly land before it fights itself to death, then tighten the drag knob a wee bit, or loosen it some if that was the direction we needed. Some people will tell you to never touch the drag when you have a fish on. Not so. There’s no such thing as never in fly fishing.

Mike Canady, Ellensburg Angler (Ellensburg, Washington):
How you set your drag on your fly reel depends on the species you are targeting, as well as the technique you are using. When fishing for trout with small flies and 5X or 6X, I generally set my drag as light as possible to protect the light tippet from breaking if the fish makes a big run. Likewise, when fishing big flies and heavy tippet, especially around brush or snags in the water, I will set my drag to “stun” (as tight as possible) to keep a hooked fish from making a beeline to the nasty stuff and breaking off.

Capt. Chuck Hawkins, Hawkins Outfitters (Traverse City, Michigan):
This is a complicated question. It depends on the species you are pursuing, the location, hook size, and tippet strength. For saltwater species, I use Lefty’s method: Pull the line off the reel with your lips only. When you can’t get anymore off, it’s set to the right pressure.
For stream trout on dry flies, I set the drag very light, just enough to control the spool. Same setting for streamers and trout. For the Hex hatch–big fish on size 6 and 8 hooks combined with fishing in the dark–I tighten the drag down. I don’t want that fish making any long runs in the dark in a log-strewn river.
Swinging for steelhead, I use a very light setting to keep my clients from pulling the fly out of the fish’s mouth w\hen they get a grab. When the fish takes the fly and the client feels it, often they raise the rod. If they do that with a very light drag, the fly stays in the fish. I can then tighten the drag for the fight.
In general, I lean toward a very light drag setting until I’m hooked up, and then tighten it down if needed to quickly land a large fish.

Capt. Dave Pecci, Obsession Charters (Charlotte Harbor, Florida):
Rule of thumb on my boat is to set the drag for 30% – 40% of the class tippet. That allows for startup inertia and any surging of the reel’s drag system that might take place. But you must consider the species you are fishing for. Snook and redfish fight in short bursts and like to move into the mangroves after being hooked. They need a bit more drag. Rockets like tarpon and bonefish need a slightly lighter setting due to the drag of the line moving through the water on blistering long runs. I always encourage my clients to go with a lighter drag setting and palm the reel (if they are comfortable doing so) when additional pressure is needed, such as turning or lifting a fish.

Rob Woodruff, Woodruff Guide Service (Quitman, Texas):
I set my drag based on the breaking strength of the tippet I am using. When fishing for bass or trout, I set up the entire rig and then pull on the fly to make sure that the drag will let out line at less than the breaking strength of the tippet. I always go with a little less drag tension than the breaking strength to make up for the effect of water drag on the line and leader.
When fishing saltwater for big fish that I expect to have a sustained fight, like tarpon, I use a scale (a Boga Grip or hand held luggage scale works fine) to set the drag at less poundage than the tippet breaking strength.

Doc Thompson, High Country Anglers (Ute Park, New Mexico):
Basically, the drag is used to help fight or tame the fish without breaking off and without fighting the fish beyond exhaustion. With that said, drag settings can range from light to cranked down depending on fish species, tippet, type of water, action of rod, etc.
When I guide and fish for trout, I like the drag setting to be a few clicks tighter than free spooling.  This keeps the line from backlashing when I’m stripping out more line. On the other hand, when I fish for permit and other saltwater species, I use a considerably tighter drag setting. At a certain point, it does become a balance between too heavy, causing a break off, or too light, causing extreme fish exhaustion.
I have found most people set the drag too light for a couple reasons.  One is they’re afraid to break off a fish, when breaking of a fish every once in a while is a fact of fishing. The other reason is they like to hear the reel scream with a running fish, but if it’s running because the drag is too light then we are adding unneeded stress to landing a fish.
Finding the exact drag setting is trial-and-error, but you can help yourself and the fish out by testing your drag.  A simple way to test the drag before you fish is to quickly strip out a couple feet of fly line with 2-3  strips. This will give you a general idea of the current drag setting. After that adjust and retest accordingly. Sometimes we have to adjust the drag during the fight; just be sure to do this smoothly with incremental adjustments.

Kip Vieth, Wildwood Float Trips (Monticello, Minnesota):
I have had 48-inch muskies that didn’t put much of a fight at all and never did get it on  the reel, and I have had 40-inch muskies that fought with a wildness of a fresh-run steelhead. A lot of it depends on the fish and what kind of mood they’re in. As a rule, I usually start with the drag probably on the lighter side. I find it easier to ratchet it down a bit, rather than risk losing a fish of a lifetime on a tight drag. Err on the side of caution.

Tuesday, March 21, 2017

Tuesday Tips - Ask The Experts

This one is from the Orvis website:

Ask the Experts: What is the Most Common Fly-Fishing Mistake?

Written by: Phil Monahan
Knowing how to cast is important, but so is knowing when to stop casting and start fishing.
Photo by Sandy Hays

Tim Linehan, Linehan Outfitting Co. (Troy, Montana):
The single most common mistake clients make? Clients make too many false casts.  You can’t refute the fact that fish are caught with flies in the water. If you have an angler in the front of the boat who makes one false cast and puts the fly right back on the water, and the angler in the back of the boat makes two false casts every time, theoretically and all things being equal, the angler in the front of the boat will have his fly on the water twice as much throughout the day. You could reasonably assume that will translate into more strikes.
The remedy for overzealous false casting is simple. As a guide, I keep a Taser gun right next to me. If a guest makes more than one false cast, I let them have it. Generally it only takes a shot or two and the problem is solved. This method is tried and true. But keep in mind if you’re a guide and decide to employ the Taser method, be sure to have your feet planted firmly on the rubber mat each time you let it rip. One time, the bottom of the boat was wet, and I gave the guy in the front of the boat a good jolt. Seems the current traveled the length of the boat and hit me and the guy in the back. Later that day, one of my guides wondered why he saw the three of us slumped over and floating downstream with a fog of smoke surrounding the boat. I told him it was the Hibatchi.

Joe Demalderis, Cross Current Guide Service (Milford, Pennsylvania):
A very common error I see is when a dry-fly angler makes a cast that is close (e.g. short), but not close enough, and then rips the fly off the water to make another cast. Almost always, this results in the fish being spooked. Instead of ripping your fly off the water, let it float by the fish and only then pick it up. Now you can make another cast to the same fish that’s clueless as to what’s going on.

Mike Canady, Ellensburg Angler (Ellensburg, Washington):
I think one of the biggest mistakes that guests make isn’t really a mistake in the way they fish or any technical aspects. Instead, it is the guests not being up-front and honest with their guide. Every morning, I ask my guests what their goals are for the trip, what they believe their skill level is, and if there are any techniques they want to get better at–such as how to mend better, or how to throw tighter loops, or even read water.
Too many times, we hear our guests say that they are very good casters and they just want to put a bunch of fish in the boat. That is a fine goal, and I will definitely try my hardest to accomplish it. However, I think that you can get so much more from your guided trip if you just be honest with your guide in the morning and say, “Hey I have only been fishing for X amount of years, I really want to catch some fish, but I would also like to learn how to do X better during the guide trip.”
The way that I look at it is that you are paying good money and spending your valuable time when hiring a guide, so you might as well get all you can out of the day. I always feel that if I can help a guest become a better angler in some way during their time out with me and they can go out later and put that knowledge to use the next time they go fishing, then I have done my job.

Capt. Chuck Hawkins, Hawkins Outfitters (Traverse City, Michigan):
Streamer fishing: Angler recast to the same area immediately after making a cast that fell a foot short.
Dry-fly fishing: Anglers don’t control the line to eliminate drag and don’t cast to the lane where the fish rose–meaning they don’t properly mark a rising fishes location
Nymphing: Anglers take their eye off the indicator.
Overall: Anglers don’t work to continually improve their casting.

Capt. Dave Pecci, Obsession Charters (Charlotte Harbor, Florida):
The most common thing I run into as a saltwater guide is inadequate casting. Most anglers have trouble casting in windy conditions and achieving the necessary distance.
You can avoid casting issues by working with a casting instructor and practicing prior to your trip. If you don’t have your own equipment, go to a fly shop and try out demo rods with a store associate. If you do that, the responsibility for a fun and successful fishing trip falls on me as your guide.

Capt. Lucas Bissett, Low Tide Fly Fishing Guide (Slidell, Louisiana):
Lack of preparation prior to the trip. Many customers come onto my boat without having picked up a fly rod since their last trip.

Doc Thompson, High Country Anglers (Ute Park, New Mexico):
There are a few reoccurring things I see on the water. One of the biggest is anglers spooking fish.  This comes in many forms, from crashing casts to noisy wading to dragging drifts, etc. Narrowing it down, I would say on the smaller rivers and streams it is spooking fish from noisy or fast wading practices, when the actual wading spooks fish one or two pools up. I often remind people that it doesn’t matter how great a cast or drift you make; if the trout already knows you’re there, it won’t eat. The easiest way to solve this is to slow down and move along or through the water slowly and quietly.

Kip Vieth, Wildwood Float Trips (Monticello, Minnesota):
This is perhaps the easiest question we’ve been asked so far. It’s all about casting, when it really come down to it. We have a big fall get-together called Musky Camp. Fellow guides and friends gather for four or five days of musky fishing. This is one of the rare times that I get to fish each year.
I was in the bow of the boat, my son was in the back, and my good friend Jon was on the sticks.  We drifted down the river throwing chicken flies. I was really struggling with my cast. My son barked at me from the back,  “Dude your casting sucks.” Well, it did. As I sat there pouting, it dawned on me: Hey I don’t fish much anymore, so how can I really be as good at it as I once was? The moral of the story is that no matter how long you’ve been fly fishing, you still need to practice. Let’s be honest: we’re not as good as we think we are. It took a smart-mouth 15-year-old boy to prove the point to me.

Maggie Mae Stone, The Tackle Shop Outfitters (Ennis, Montana):
Fly fishing is one of those sports where you are constantly learning each time you’re out.  As a counselor and guide, I find mistakes to be things that will help you to learn and grow. Here are the three most common mistakes that get us learning when out with a novice angler.
Strong knots: I get many clients who want to learn to tie on their own flies, which is so great! We usually start with an improved clinch knot, which can be used for just about any size and type of fly. The angler will learn very quickly if that knot is tied well; the first time you lose a fish to a poorly tied knot, you’ll find yourself becoming a knot tying expert!
Fly Choice: Many clients (especially kiddos) want to dig through my fly boxes and pick their own flies. Most want to put on something pleasing to the eye, like a big flashy streamer.  A quick entomology lesson about what is hatching or how trout are selective feeders usually lets the client know we need to switch up our fly to match the hatch.
Good presentation: My saying in my boat is “You can’t catch fish in the air!” Some novice anglers think you need to be a great caster to catch fish. This is not true. We work on a natural presentation and keeping that fly in or on the water as much as possible. Once they understand that we’re trying to imitate a certain bug and provide the most realistic drift possible, they find themselves getting into fish.

Capt. Tony Biski, Monomoy Fly Fishing (Harwichport, Massachusetts):
Too often, anglers cast to the same spot over and over. I telll them to fan their casts to cover more water.
Stefan Woodruff, a href=”http://ellensburgangler.com/” target=”_blank”>Ellensburg Angler (Ellensburg, Washington):
One of the biggest mistakes I see clients make in my boat is not letting their flies fish. As much fun as casting a fly rod is, most fish are caught in the water, not in the air! Maximizing the amount of time the fly is in the zone–especially when dead-drifting dry flies or nymph rigs–means mending effectively and efficiently to achieve the longest drift possible, which will in turn show your flies to more fish. Unless your only goal is to look like Brad Pitt in “The Movie.” Then, by all means, cast away!

Tuesday, March 14, 2017

Tuesday Tips - A Few Ways Not To Break Your Rod

Whether we like it or not, we're going to have the odd accident here and there. Car doors, falling, you name it, there are lots of accidental ways to break your fly rod. 
As blank technology has improved (to increase performance) the sidewall thickness in rod blanks has gotten thinner and impact resistance has dropped.

But there are a few things you can do/not do to decrease the chance of breakage.
Keep your hand off the blank when playing fish

1- Don't play fish with your hand riding up the butt section. 
One of the top ways that rods are broken. People try and get more leverage by putting their hand up the butt section. This affects ferrule flex angles and will invariably lead to breaks at the ferrule. If you keep your hand on the cork, and use proper rod 
angles, you'll fight fish way more efficiently.

2- Don't shock the rod when snagged on something.
If you you get snagged on something like a tree, don't repeatedly jerk the rod back. Graphite can take a huge amount of bend and stored energy, but when it is shock loaded repeatedly it will often fail and then you have a broken rod.
If you aren't able to reel in line and go retrieve your fly by hand then point the rod tip at the snagged fly, hold the fly line at handle, and gently pull until it pulls free or tippet breaks. Make sure to leave at least 4 or 5 feet between rod tip and snag, otherwise the fly can snap back and hit the rod tip. This may lead to a tip breakage.If you lose a fly doing it this way its way better than busting a rod.
Right way
Wrong way when snagged


Wrong way
3- Keep the rod angle in front of you when playing fish.
Still continually see people playing fish just like the angler on the
old Orvis logos. This is not great for couple of reasons. First, and
relevant here, is it will often lead to rod breakage. As soon as the
rod butt gets back around your cheek and ear the risk of
breakage increases greatly. As soon as butt gets behind your ear
you're going to break the rod. Maybe not today but it's going to

happen.The other reason to shallow the angle of your rod when playing fish is that you are WAY MORE efficient. If you keep the tip way up you play fish with the tip (you can't lift a pop can with the tip) If you shallow the angle you play the fish with the butt of the rod. (you can exert a LOT of force with the butt of the rod).
By using a shallower angle and always applying pressure opposite to the direction the fish is swimming you will land fish quicker, land bigger fish, be easier on the fish, and break fewer rods. Win, win, win, and win.

4- Don't set the rod around doors and tailgates.
You've heard this one a lot! But you still do it. Lean a rod 
against the vehicle around open doors and tailgates while you
get gear on or off. Something is going to happen and a rod will
get broken. In a perfect world we put our rod away in a tube or 
set it up last but we don't live in a perfect world.
So, the safest, foolproof way to store the rod around a vehicle is
to put it on the windshield, under the wiper, like the photo 
shows. This will keep the rod safe from doors, wind can't blow it
over, and you can't drive away and forget it.

Monday, March 13, 2017

Limited Edition Lamson Reels

Limited Edition Waterworks-Lamson Speedster HD reels in black and orange. A pretty sexy addition to your next flats fishing trip.

Speedster HD (“Heavy Duty”) follows the lead of our Arx and Guru HD reels by incorporating a full-cage design to capture line without failure. The full-cage design is the solution for thin-diameter running lines that are inclined to escape through spool/line-guard gaps. Speedster HD and Speedster have a taller and more narrow format compared to other reels in our lineup.
Format: Super Arbor
Materials: Machined 6061 Aluminum, Stainless Steel
Finish: Hard Alox
Drag: Sealed Conical Drag System
US Made, Idaho Built


Friday, March 10, 2017

Do You Know Where This Is?


If you know where this is, go to our Facebook page...Like our page, Share the photo, and tell us where it is for a chance to win a Howler Brothers T-Shirt and a Simms Mesh Reel Cover

We'll draw a name and let everyone know on 
Wednesday, March 15.

Tuesday, March 7, 2017

Tuesdays Tips - Getting the Boat and Trailer Ready This Spring


Even though there's likely to be a bunch more winter before it's done, before you know it spring will arrive. Sometime in the next couple of months you'll want to get the boat ready for next summer's float trips. Here is list of what to go through when getting your boat ready as well as some ideas for how to keep it in better shape for down the road. We are assuming that the boat is stored outside. If yours is not then some of these are not applicable.


Checklist for getting the rig ready:

1) Remove your cover. As soon as weather permits you should completely wash the winter grime off of your cover and let it sun dry. Best is to hang the cover on your fence when washing and drying.

2) check your trailer hitch. Make sure that hitch is clean and lock assembly moves freely from the lock to unlock position. Grease the hitch (best way is to sit until you tow it first time. put grease on trailer ball and then hook up trailer.)

3) Check tire pressures, including spare. If a trailer has sat over winter the tire pressure is likely low.

4) Check condition of tires and tread. Now is the time to find out you need new tires and get them, not on the road to Carseland. Tread should be 9/32 depth on tread with no cupping (uneven wear patterns). **if you notice cracks on the side of your tires this is called weather checking. It is caused by too low of tire pressure and extreme temperature variation like you see in the winter. On a trailer tire, this likely won't lead to failure but keep an eye on them that it doesn't get a lot worse. Next year make sure the tire pressure is up before you store it.
**if you are getting strange, uneven, or premature wear on your trailer tires the likely culprit is the axle and/or alignment. Standen's in Calgary can fix you up .

5) Make sure hubs are greased. This should be done after every three or four uses through the season. If you don't have Bearing Buddies, get them. Hand greasing bearings really sucks. At this time, make sure there isn't any grease on the back side (axle side) of the hub in quantity. If there is it means you have a seal failure and it should be replaced.


6) Hook up to vehicle and check all lights. **This is the time to get them all working. Now is the time to get that grease in the trailer hitch as well. And while you're at it, check to make sure you're trailer hitch is adjusted properly. With the trailer hitched up, lift up on the trailer, if there is any movement of the trailer hitch on the ball (you'll feel it and hear the clunk) then you need to adjust the hitch.

7) Since you're hooked up, make sure that trailer rollers are in good shape. Also, check your trailer bunks. Over time the carpet material wears out on the bunks. Now is the time to take care of that. Running for a season with a bad bunk or roller can severely damage the bottom of your boat

8) Check your anchor rope. They do wear out over time. Make sure that your anchor release works properly and the connection assembly (clevis) on your anchor works ok. Nothing worse than getting to a boat launch first time of the year and you can't get your anchor installed.

9) Check storage and seat storage. Now is the perfect time to get organized. And also a great time to find that junk you left under a seat last October and get rid of it.

10) Check seat operation and seat pads. Make sure they swivel like they're supposed to. Check seat pads for cracks or wear. A little trick to keep your seat pads lasting longer is to clean them and then spray with 303 protectant (available at Canadian Tire). Do this in the spring and your seats will stay way nicer. If you do have a crack in a seat pad the best way to address it is to put Aquaseal on the crack or tear. This will delay having to replace for a season or two.
And if you used the 303 to start they likely wouldn't have cracked.

11) Check any trim (black edge trim on Clackacraft gunnels, rubber trim on boxes and gunnels on Hyde, etc.) Some of these items become loose or worn over time. Half an hour with some contact cement will keep your boat in a lot better condition when it come to edge trim, etc.

12) Once all of this is done it's time to wash the boat completely. The place to do this is at a car wash. The high pressure wands are the very best way to clean a boat. Kick the boat off the trailer just enough so that water will drain (rear drain holes). Completely spray clean inside of boat and then do outside. If you have built up dirt or staining, use a product called Spray Nine. Just spray it on the area, scrub with a brush, and then high pressure wash. Makes it look like new.
For the outside of boats that have the "scum line stain", you can use another product, called Black Streak Remover. It is sold at RV dealerships and is used on fibreglass sided RVs. Works great on boats.
**To keep your boat clean and not get staining and those scum stains on the outside is really easy. Power wash your boat inside and out after every use. That night, not the next day. Also, if you use car wax on the outside of the boat when you do the spring cleaning (after you wash it) the scum washes off easier.

NOW GO FISHING!


Friday, March 3, 2017

Do You Know Where This Is?


If you know where this is, go to our Facebook page...Like our page, Share the photo, and tell us where it is for a chance to win a Howler Brothers Hat and a Howler Brothers Arroyo Shirt.

We'll draw a name and let everyone know on Wednesday, March 8.